Uncategorized

Have You Heard Of Monat!

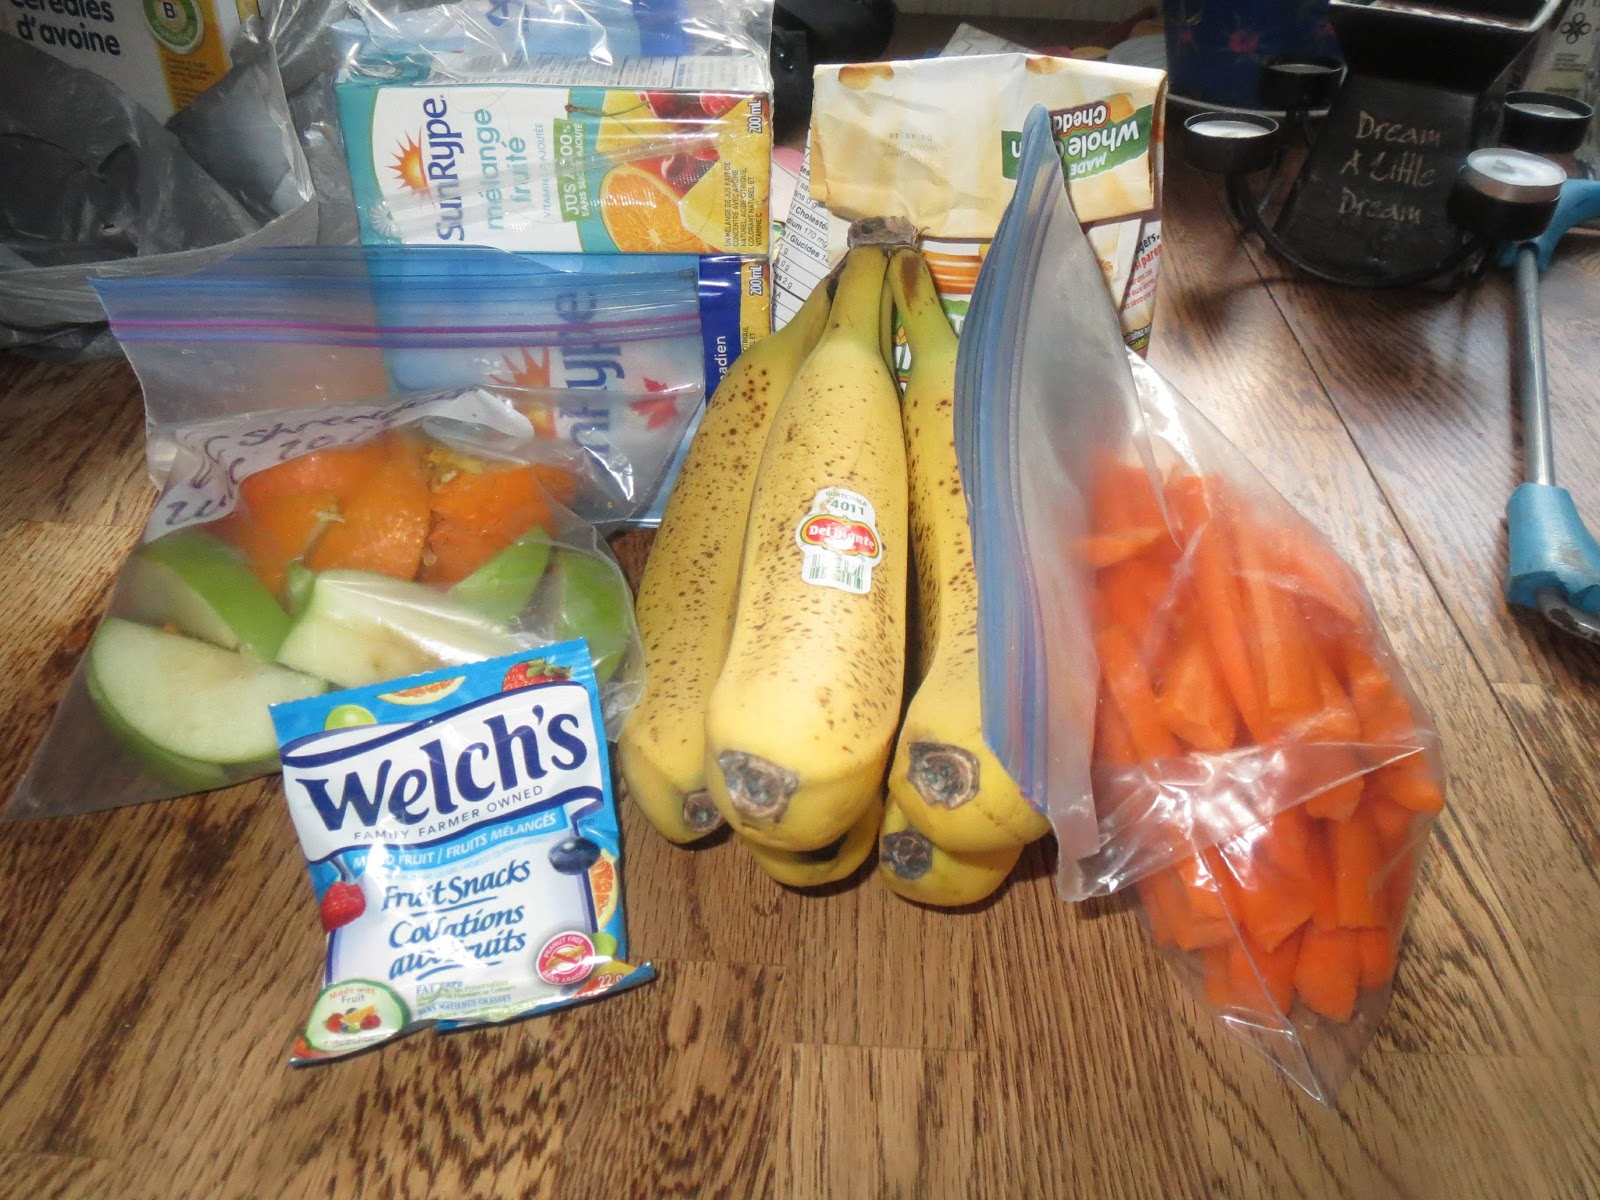
With everything so crazy, trying to remember what is on my list when I go into the city to get groceries. Not to mention that only one person can going with one cart! Fine and dandy except before this all started I used to need two carts, that was just on the city grocery stock up. Now I need to think about what is going into the cart as I need to get everything in ONE cart.

If I can get it some where easier then why not leave the cart room for say all the jugs of milk we go through! Hi there am Kandis!

Welcome to CLASSY CLASSIC’S BY KANDIS. I am a mom of 4 children ages 11,9,3,and 1😥 lol. I have been married for over 11 years.

Not long ago I went in on a new goal, a new drive. I never was one to care or take care for that matter of my hair! My hair stays up in a pony tail or a mamma bun, I mean for DAYS, I don’t brush it much… like actually I’m the worst for hair care. I needed something a little better, I needed so edging that would care for me hair and skin for that matter when I’m neglecting it taking care of so many other. I then signed up for MONAT!

Not really knowing much, not really thinking it would change my life, everything deserves a chance right?

Then it happened, I learned I like it lol, I learned that it does help my hair, I learned that my hair likes the love lol. I decided to try to spread what I know no, on a product that is healthy for not only my hair, the environment, animals and actually my wallet.

Now I say it like this as when I first seen Monat, I felt it was over priced and money sucking!

Then I learned!

The bottles that my hubby and myself have been using lasted both of us… Ok 1 bottle of shampoo and 1 bottle of conditioner lasted us 3 MONTHS!

I only need a quarter size for my hair, my hubby uses roughly nickel size!

To point out short version style, I broke down the cost and a bottle is running us less then $6.50 a month or $13.00 for both a month!

THAT IS ACTUALLY CHRAPER THEN STORE BRANDS!

So if you want some cool, info I have outline what I found to be the base of what I wanted to know and what I felt people should know about product! It may not be for everyone, however there is so much variety that there is actually something for everyone! This is where your Monat person ( like me) comes in to match and help if you get lost to help you find the perfect match. All in the comfort of your home! 

ARE YOU READY?

HERE WE GO!

Here are some facts that I find oh so important about these products! 

#1:MISSION

Their mission is to help everyone enjoy naturally based products from root to tip! #2:PROMISE

They promise their products are

▪︎safe

▪︎vegan

▪︎cruelty free

▪︎backed by science

There is more to their promise!They say no to addingparabens,cyclic silicones, phthalate, sls/sles, plastic microbeads, harmful colors, harmful fragrances and no animal testing!!!

All in the promise you will love these products no matter what your hair type is! 

#3 THE DIFFERENCE

There is already over 1 million vip customers, it’s a family owned company, giving back to communities, anti-aging products, dermatologist and ophthalmologist approved, safe naturally based products, products are backed by science, they ship over a million units of products a month all over the world, the BIGGEST difference Monat has is THEIR 30 DAY MONEY BACK GUARANTEE

#4:THE PRODUCTS!

How is their products better?

KEY INGREDIENTS:

Hair:

Rejuvenique oil intensive- has 13+ natural plant and essential oils capixyl- protects and strengthens growthprocatiline- helps protect hair against stress by adding antioxidants crodasorb- helps protect color hair from fading

skin:

rejuvenique s- comprised of 17 botanical oils natural fruit acids- makes skin GLOWexclusive peptide- helps with skin elasticity moss cell plant base stem cells- helps repair and regenerate

Pet:

rejuvenique- botanical oils sulfate free cleanser- gentle on them but cleans dirt and grime offodour scavenger- helps block odours

THE INGREDIENTS ARE PART OF THE MONAT PROMISE AND ALL ON A 30 DAY MONEY BACK

#5 WAYS TO SAVE THAT MONEY

There is 3 ways to join, buy, and purchase with always at least up to 25% saving! I will go through each thought out the day but…the simple view is

1: retail customers… can save up to 25% plus more when you unlick more savings!

2: vip customer… 15% off instant with the up to additional 25% off plus more details to come!

3: market partner opportunity…30% discount with up to the additional 25% off with much more details also to come!

LOOK IT OVER , TAKE A THOUGHT, FIND A MARKET PARTNER WE ARE EVERYWHERE  OR WRITE ME FOR MORE DETAILS (MONAT HAS GROWN EXCESSIVELY OVER THE LAST COUPLE OF YEARS) HOW TO BE APART OF MONAT!

With 3 ways to enjoy monat, why not look!

WHO doesn’t love options in their life! With so many different varieties of products there is varieties to save!

Have you ever thought about trying something new?

Want something that will help? Not just look nice but actually help?

I bet there is a monat partner in your area, on Facebook, or Instagram we hid everywhere! Can’t find one, the nice thing is you can go through others like me! With a simple comment we can be finding you the best match for your hair and skin needs.

http://www.mymonat.com/beyondhair

If you do not follow go ahead and follow me for notice on new blogs.Want more follow along on Facebook Classy Classic’s By Kandis and Instagram under Kandis Blask, for more day to day fun.

Till next blog, have a great day, amazing weekend and a productive week!

Uncategorized

Home Products I Love!

With the month of March here, with the eco friendly month I thought what better time then now.

When Sunday had come and go, we were doing our prep and stock in the house. I realized how much I love to make some of my products that I don’t think about anymore and just make.

Do You make cleaners or products?

These are great for so many different reasons.

They are better for the environment, our bodies and best of all the wallet.

How much the products cost to buy vs to make!

This alone makes it easier for me to want to make them.

I have been making these for years now with no thought or intention to buying them again.

The first product is all purpose cleaner! I can use this EVERYWHERE from counters, windows, walls, toilets to sticky spills, and messes from the children.

This sanatizes, cuts grease and cleans with only costing pennies.

Ready?

In a spray bottle mix vinegar and water! If you want add some essential oils to make it smell and bam your ready to clean!

All purpose cleaner!

If you have babies in diapers then you will know how much wipes cost! I am here to say there is a way cheaper and healthier to use.

Take selet a size paper towel, cut it in half! In a bowl combine 3 tablespoons of melted coconut oil, 2 tablespoons of baby wash and about 1 1/2 – 2 cups hot water? Soak paper towel in the water mixture.

Wring out and if you would like unwrap in an accordion motion.Place in a zip-lock or air tight container, these are great, and will still work even if get forgot about and freezes in the car lol.

Baby Wipes with NO ALCOHOL

 Another product that I have been making for a long time now is fabric softener! This is so easy and will save a ton.

Take an old fabric softener jug you will need:

  • 2 cups conditioner (any kind),
  • 3 cups of white vinegar, then
  • 6 cups of warm water.

Add all together then shake jug.

FABRIC SOFTENER for pennies!

Another product I want you too know about is my makeup remover face wipes. These are used with the same solution as the baby wipes. The only difference is less water!

Take about a cup of warm water with 1 tablespoon of baby wash and 2 tablespoons of coconut oil. Soak paper towel and slightly wring out!

I am in love with these makeup remover wipes, my face feels clean, with no tighness of hidden chemicals in the store bought. I have no intentions on going back to buying these!

MAKEUP REMOVER leaving your face feeling clean!

Next product my laundry detergent, I have been making for a long time now! This uses:

  • boarx
  • baking soda
  • arm and hammer laundry soap
  • oxy
  • sunlight bars (grated)
  • unstoppable beads
LAUNDRY DETERGENT LAST SO MUCH LONGER AND COSTS MUCH LESS!

How about homemade fabreeze, the kids don’t like the “real” product anymore lol, so to make this:

Take an old bottle or a spray bottle, mix baking soda, with essential oils with water shake before each use!

FABREEZE change the sent added help with the baking soda!

These products I have been making now for years! They have added so much “cleanness” in my house, added dollars to the bank account!

Do you make products?

What kind do you make?

These are just some of the products that we make in our house, I love making my own stuff, it’s nice knowing what is in them, and knowing how much I save is just as sweet as the frosting on a cake!

I would like to take this time to say these products are in detail with pictures in my other blogs.

Head over and have a read, or you can write me with any questions or comments on these!

I hope you enjoyed this blog for the eco month of March.

Hit the like button too let me know if you liked it, so I can be sure to do more like, this!

Hit that subscribe button to follow me and get notice on new blogs every week!

Not enough 😉

You can also find me on Instagram under Kandis Blask or over on Facebook Classy Classic’s By Kandis for more daily posts with all kinds of fun!

Till next week have a great day, amazing week and productive weekend!

Uncategorized

Go To Cake Recipes!

Birthdays, holidays, class treats, after school activities, weekend parties!

These are some reasons I love my go to cake/cupcake recipe. Chocolate, vanilla or marble always great choices.

When something comes up there isn’t always time to find a recipie, then wonder if it’s right?

Will it be ok?

Is it the right thing?

In this house if a emergency goodie day comes up I usually have it under control.

If I’m not whipping up a batch of cookies you betcha I’m going to one of these recipes!

As a mom of 4 and 2 of them in school days come up that I need to get something together quick.

I am not down the street from a store and that’s not my style lol. These batters are great for fast cupcakes or a cake! I have a chocolate batter also a vanilla batter!

Let’s start with the fudge chocolate cause yes please it’s chocolate! This is a great one, I have been going to it for years now!

The stains on the page show it!

  • 1 2/3 cup flour
  • 1 1/2 cup sugar
  • 2/3 cup COCOA powder
  • 1 1/2 teaspoon baking soda
  • 1 teaspoon salt
  • 1 1/2 cup buttermilk
  • 1/2 shortening
  • 2 eggs
  • 1 teaspoon vanilla extract

Heat oven to 350°

Grease pan using either 13x9x2, 2 round pans, or 2 bundt cake pans.

Beat all ingredients together on low making sure to scrap the sides of the bowl, do this for about 30 seconds, then mix on high till mixed well.

Bake until wooden pick comes out clean. 35-40 minutes for oblong, 30-35 minutes for round, and 40-45 minutes for bundt cake, 20 minutes for cupcakes. Let completely cool then frost.

Then let’s do the vanilla! This is a denser cake, I find anyways. With it just as easy as the chocolate you still can’t go wrong. One thing I love about going to a vanilla cake is that you can the the cake to any color you need! The vanilla cake is called ” silver white cake”.

Let’s see what and how to make this go to vanilla cake.

  • 2 cups flour
  • 1 1/2 cup sugar
  • 3 1/2 teaspoon baking powder
  • 1 teaspoon salt
  • 1/2 cup shortening
  • 1 cup milk
  • 1 teaspoon vanilla extract
  • 4 egg whites

Heat oven to 350°

Grease pan

Beat flour, sugar, baking powder, salt, shortening, milk and vanilla extract. Mix on low scrapping the sides for about 30 seconds. Beat on high still scraping the bowl till mixed. Pour into pan/s.

Bake until wooden pick comes out clean. Oblong 35-40 minutes, 30-35 minutes for round or 20 minutes for cupcakes. Let completely cool then frost.

There you have to!

These are the two go to batters I go to whether for cakes, cupcakes or both.

I hope you enjoyed this blog. Hit the like button so I know to do more blogs like this one.

Don’t forget to hit that subscribe button for notifications on new blogs!

Also follow me on Instagram under Kandis Blask or over on Facebook Classy Classic’s By Kandis for more daily posts with fun!

Till next week have a great day, fun weekend and productive week!

Uncategorized

Valentine’s Fun!

There must me something about the red’s and pink’s!

Hearts everywhere, gaining weight off the chocolate! Slowing down to smell the flowers!

In our house it’s extra special as my first born, my only daughter was born on Valentine’s day 11 years ago. Yap my daughter turned 11 this year.😣 

Valentine’s day is always fun, with treats and cheesy sayings it’s just a fun holiday.

Every holiday I send teacher gifts, and valentines day is no different. Do you send teacher gifts or treats to the classroom?

This year a little less but with just as much love and thought. That’s what makes the gift any ways is it not?

With being on a little more tight budget I’ll show you what we did this year, I will also, point out it was done for roughly $5 a person. As usual I hit up a dollor store and set out.

Dollar Store Haul! I love dollar stores! ❤

This year I purchased a

  • Valentine’s Box
  • Notebook
  • Candies
  • Cupcake liners

I then made mini cupcakes and found some unused pencils in the house.

Teacher gifts in the making!

The turn out was adorable.

For the classrooms we bought valentine cards ( which we usually make), we also of coarse also treats. Lots of cupcakes went into the over in a day, but they are so cute.

We made heart emoji cupcakes for my son’s class, and a cupcake cake for my daughter’s class. I had also made a cake for her birthday.

Where to start with all the Valentine’s day fun!

Let’s start with the teacher gifts. In the box there is some conversation heart candies, a couple chocolates and a pack of sweethearts!

Then I placed 6 mini cupcakes on top! The boxes came with a plastic wrap, so just put the notebook under the goodies box with a pencil on the side, got the toddler to help tie them up and BOOM, awesome teacher gifts for $5. The bus driver got the same, but in a cute pink heart tin and no notebook!

All for roughly $5.00!

Then I placed 6 mini cupcakes on top! The boxes came with a plastic wrap, so just put the notebook under the goodies box with a pencil on the side, got the toddler to help tie them up and BOOM, awesome teacher gifts for $5. The bus driver got the same, but in a cute pink heart tin and no notebook!

How to make the treats?

Let’s start with the emoji cupcakes.

Bake and cool the cupcakes, with yellow icing for the face, I used conversation hearts for the eyes, then drew on a smile!

Yes, really that simple for little time.

Heart Emoji Cupcakes!

The cupcake cake in the shape of a heart was just as quick and easy.

With cupcakes baked and cooled, place them on a pan in a shape of the heart! Take your icing, tink it pink or red….. of coarse, with a knife ice the cake!

I start at the outside and work inward!

That’s really as there was, it all turned out better then I thought, and most importantly the kids loved them!

These are done for very little, but will send the love threw the air!

Heart Cupcake Cake!

What did you get for Valentine’s day?

Do you go all out?

Send goodies?

Make or buy cards?

Let me know in the comments!

I hope you enjoyed the valentines day fun blog, hit the like button so I can do more like these.

Don’t forget to hit that subscribe button to follow and get notification on the new blogs every week.

Want more come join me over at Instagram under Kandis Blask or over on Facebook Classy Classic’s By Kandis for more daily posts!

Till next week, I hope you have a great day, wonderful week and productive weekend.

Uncategorized

Teacher Gifts 2019

Another year, another round of giving! Do you give out gifts for the kids extra people? This year is all about simple and thoughtful!

Hi good morning and welcome to Classy Classic’s By Kandis!

Can you believe it’s almost time for the jolly man to come? This year for the teachers we thought we would keep it clean, simple and cute.

With the year coming to an end…. a very long emotional, stress testing year, I decided it’s all about the giving, in a smaller way!

My kids have 4 teacher gifts to give out this year. I am the mom that will put so much thought and extra into gifts that it almost become more then it should! So this year I went to the dollar tree and had it set out for about $5 a teacher. This may seem little but I really like how they are coming together!

If the gifts seem “not done” that’s because, well they are not! Hahaha.
I wanted to get the blog set up tho to help with so e cute ideas for this holiday season when it comes to the “other” gifts.

The teachers, bus driver, leaders, coaches ECT.

These little gifts that are probably the cutest I think to make, but can add up quick if you don’t pay attention. I did around $5 each to make under $30 for all the extras. They are also all the same other then the towel design is different, just to show some extra thought. This is also tho we are from a small town where everyone knows everyone. So if that is not your case or style it is very easy to make them all the same and be fine.

How ever like I said they are not quite done, only thing that is missing is small items for in the cup, and the cookie trays are not done yet!

Next week I am picking up the stuff to finish and the trays will be done by then as I have the baking mapped out on my weekly to do!

Head over to my blog on 5 tips for a stress free Christmas, to see what I do to help break, up the tasks throughout the weeks.

So back to the main thing haha…. squirrel brain!

This year I really like the feeling on these!

There is a cute mug, travel cup, Christmas towel, cookie tray done by me 😁, then to finish it off I am going to fill the to go mug with little goodies and hot chocolate mixed!

All hopefully tucked in a cute basket wrap! This is also cause would you believe when I went to the store I could not find a cute Christmas basket!

All wrapped up I think they will be so cute, easy to carry and very yummy and thoughtful!

I’ll make sure to post updates as they get completed. We however have about 2 weeks till they need to leave my house, so as I said they will get finished this week!

I hope this gave you some ideas for those little gifts. You can also head over to last year’s posts on Instagram.

Make sure to follow me on Instagram under Kandis Blask or over on Facebook Classy Classic’s By Kandis. There will be the finished product there also lots of daily posts on day to day fun and ideas. Lots of motivation and everything in between!

I hope you enjoyed this week’s blog, make sure to leave a comment so I know if you like this kind of blog!

Hit that subscribe button to never miss a blog, new blogs on Saturday’s!

Till next week I hope you have a great day, amazing week and of coarse a thoughtful warm December!

Uncategorized

A Little Can Go A Long Way

Bills, mortgage, insurance, grocery, coffee, kids it all adds up! What do you think you spend the most money on?
I bet you have more money then you think!

Good morning and welcome to Classy Classic’s By Kandis! I am super excited to write this blog!
It’s an outline for……. budgeting! Do you have debt, live paycheck to paycheck? Trying to save for a vacation or a big purchase?

There is so many ways to “budget”, which way have you tried? I have designed a way that I found to work lovely! I say this as I did it and now we are out of debt!

I find just as a morning routine or a cleaning routine, there are so many different ways out there how do you know what will work? Everyone has different jobs, different income, different bills, different dreams and goals!

With this outline you pick how to roll with it. Just as habits it comes down to how bad do you want it?

You are not going to get out of debt, if you keep doing what you want. Want to save put that $5.00 in a envelop not at the store on a latte!
It sucks to hear but no one said being a big person was always fun haha.

If you are ready to start getting out of debt then you can do it. I have broke down a quick pyramid outline to help get you started. There is steps to help you see how to break down your expenses to make as much as you can stretch.

Will it be easy? No!
Will it be fast? Faster then before!
Will you stop everything you enjoy? No, and not forever!

Without anymore hubba bubba let’s get into it.

Step 1: The first step is a important one! Find out what your monthly income is! You can’t save anything if you don’t know what you have to work with. The best way in have found for this is to simply get a statement out and as you go over it color code it. This will help with all the steps. If you can see where your money is going you can see where to add or subtract your spending. This is not a hard task and will not take long. Don’t forget it’s colorful, and organized after.

Step 2: Fixed Expenses! No matter what being an adult means bills! Bills, bills, bills. They come in all sorts of sizes and baggage. There is house bills, car insurance, everything has insurance lol. Preauthorized payments, bank payments all of it. These are payments that are the same or close to month to month. Figure out what is being taken out, and must be paid every month  no matter what. Got them, they should be a pretty color on the statement. Simply add them together. This is what you need to clear each month. Got bills covered there is more wiggle room, less stress, more clarity on your “left over” money!

Step 3: Loans and debt! It is there, no matter how you justify it  they money was spent and needing to be paid. This can be of any amount! Large ones from schooling, a car, house. To borrowing a couple hundred bucks. According to Jordan Page you start with the smallest to largest. Take as much as you can budget to pay off what you can. If you are paying $100.00 on a loan, and $200.00 to pay your relative off, pay the person back, roll that debt money to your next debt. Each time a loan, or payment gets paid or the amount goes down you can roll that amount!
Example is: I paid off our credit card, now we actually have a positive balance. I paid higher amounts to cover the interest rate and payment, then took only a hundred dollars off my “budgeted” amount and rolled it anothet debt. This way as my card was getting paid first then other bigger ones was getting some then more and more till it’s just gone!
Step 4: It seems know matter what the grocery store costs so much money. Have you sat down and done an inventory list. What is in the back of those cupboards, or the bottom of the freezer! Do you meal plan? Meal planning can save so much, if you don’t impulse buy you can save tons! I have heard to budget $100 per person per month! I say no way! This is one of the easiest places to save money. Buy only what you need for that grocery time. Whether it’s a week, or a month you can meal plan and keep it under budget. Make some casseroles, soups, throw together meals with the hidden pantry food. This is also for baby items, and house products. You can do it all cheaper then the store. Make baby food, have you tried Diy cleaners,  they work great, last a while, no chemicals and so so much cheaper. I have not bought “cleaner” in almost 10 years! Yap I make it, also I will not stop. I love my cleaners, and diy products.

Step 5: How do you save when you owe? This one gets people stressed. It is hard to see the progress while the iceberg is so big. However when trying to save and get debt free, I suggest small. Empty your change, count that after each week. Use a cash envelope for your ” extra” money, you will hold on to cash easier then not swipping. Saving that coffee mobey instead will add up. Say no to the quick grab food/snacks. Remember every bit counts!

Step 6: The “extra”… There is always something that comes up! Kids, house, pet or personal, there is always something. If it’s extra and not an emergency, I’m sure you can do without. Kids lunches sorry only packed from home. City runs, or fast food nights! Nope eat at home, or pack a lunch for in the car. There is lots of extras!

Step 7: You still need to spend some. After everything that is being cut back, you can still save and have fun! Did you stick to your budget? Have a take out night, buy some ice cream for family game night! Just don’t over spend! Make it fun, what can you get for $20.00 to do a fun night! There is always ways to do something cheaper or free.

 I hope this blog has opened some doors, cleared up some questions or concerns! Have questions, I’m here! Ask away! Here or over on Instagram under Kandis Blask or on Facebook Classy Classic’s By Kandis! I will help with any questions!
Got some other advise let’s here those comments!
We all work different, let’s have those ideas to make everyone succeed.

It will take time, it will take work!
Yes you can do it!
As hard as you want it,  will be how hard you work for it!

Till next time everyone have a great money saving day, I will talk to you soon on the media pages, and on here with another blog next week!

Uncategorized

Peaches Peaches 80lbs what did

It’s funny how every year it can be the same! You know it’s coming, you prep and prep, give yourself a self calm talk. Mark it down in the planner, but still get stressed thinking about doing it all.

Hi I’m Kandis and welcome to Classy Classic’s By Kandis!

Every year in our town we get a “case lot sale”. I stock pile what I can for the winter, this is also where and when I get my peaches! ❤
When I do peaches, the smallest batch that I purchase is 80lbs!😮 Yes, the lowest is 80lbs!

Why so much, and what do I do with it all! Let’s talk about stocking up on peaches! Well let’s start at the beginning.
The cases are 20lbs each, so get them loaded into the house, I then sort them, softener and still hard.

These get sorted for time frames and what is being used for what. I do/ make with these: canned half peach jars, jam, peach leather, and of coarse some sliced for in the freezer for easy asses for mostly pies!

Oh I love stocking up on peaches, I stress out more then I should as I have been doing this now for years, and it’s looks more intimidating then it is.

Let’s start with canning! Take your desired peaches, wash them up. Then you blanch them! This means simply put them in boiling water for 1 minute then into cold water. This will allow the skins to “peel” off. So go ahead and peel them, cut in half and take the pitt out. Place the peach halves to the side. I use a medium syrup this is 3 cups of sugar to 4 cups of water. Heat this up not boiling, but to make the sugar dissolve and liquid hot. Sterilize your jars and seals. I use 1L jars when making mine. Fill your canned and place on stove and start to heat. This will take some time to get it boiling so I start it early. So with your jars clean I put them in the sink with hot water and the seals in a pot of boiling/ hot water, as the jars and seals need to be hot when packaging up! Take your hot jar, place the peach halves in the jar pitt side down and layer them, up to the top leave about 1/4 inch for room for the pressure. Add your hot syrup and wipe the rim, add seal and screw top. Place in canner! When canner is full of the jars add hot water to cover the jars. Bring canner to boil and let boil for required time. This is refured to as a water bath.
So that is how I do some of my peaches!
A good chunk of the  any ways.

Next jam! I made peach/ cherry jam this year.
The cherries on my tree did wonderful and so I needed to use them. For this I simply blanched, peeled, pitted and chopped the peaches, and pitted the cherries. Add the  to a BIG pot, with required amount of sugar. Depending on what kind of jam and your sweet tooth will depend. I don’t use any added thickened, so I do a long boil. Then as your peaches, fill hot jar, place a hot seal and lid. Boil in the “water bath”….. the canner for required time for the jar size!

So now that there is canning and jam let’s move on shall we.

My mom growing up always made Apple leather!
Home made roll up but with our crap apples after she made juice.
So now I make Apple leather but also peach leather! 😍

Take the peaches and cut the pitts out, these do not need to be blanched. With the pitted peaches, peel on put into a blender, I add honey, about a tablespoon per I dunno 3-4 cups. This just helps keep the color and make it more pliable. I use a dehydrator, put parchment paper on the racks and pour the peach sauce on. Leave on the dehydrator until peach sauce is dry and a leather!

One of the last things that I do with the peaches is slice the, for the freezer to make any peach goodies through the year. Simply cut in half remove the pitt, slice the halves. Put into large freezer zip lock bags label and put into the freezer!

There you have it, how this mamma went through 80lbs of peaches this year, to help stock up till next summer’s case lot sale.

Do you do canning?
What do you can?
I will be sharing more stocking up tips thought out the month.

Getting the food prepped and stored for the winter months! Do you do anything with peaches, or large amount of friut.

Our Apple tree didn’t produce this year as every some years it does however I will share what I am doing with what I get this year.
I hope you enjoyed this blog all about stocking up on some extremely yummy peaches.
Got a question?
I will sure try to have an answer!
Ask away on Instagram under Kandis Blask or over on Facebook Classy Classic’s By Kandis.
I would love the questions, comments and input.
Till next week I hope you have a great food stocking week.
What are you storing this year?
Let me know.
Till next blog, have a fantastic week!

Uncategorized

The Garden and How Its Growing

When growing up the garden was always there. My mom always had a garden, if you had the room you grew a garden! That was how it was.

We learnt never to say we were board, especially when mom was in the garden!
You were not going to be board long, she made us help with the gross potato beatles!

To this day I remember how gross they were and I am oh so thankful that I do not have them! I think it was the kind of potatoes that she grew.

I remember getting into trouble for my best friend and me eating all her peas, or chewing up the green onions cause it made out spit green! Haha oh the memories in the garden.

Those memories have changed a little as I am the one planning, planting, weeding and pulling, prepping and so on. With this said I could not imagine not having a garden. It’s a lot of work, but the outcome can be so great. The years have changed and out weather is not the same…. by know means.

It has almost been freezing here already and it’s August. With the last couple days of August here, it is time to start getting some out, and prepping for the end of the year. I had a couple picks already, with hopes of another good round.

However, it has been a pretty wonky year for the garden, and my time has not been quite there with out secret mission on the last big push now. I thought I would take you along thought the garden this year and share what I have got, and what I am doing with them, to help get us through the winter!
Do you garden?
What grows great for you?
What seems to just not grow?
Let me know I love a good garden talk!

So the weather is not changing and it is time to get stuff out. When I had started the blog, as I ran a week behind.

Last couple weeks I have been picking lots of peas and beans out of the garden! Radishes did good this year, these I plant with my carrots as radishes are the first things up and our of the garden it does not interfere with the carrots growing. I will share how the carrots did on facebook when it comes time to get them out!

With picking them we got about 3 grocery bags of them. I also picked my one big row of green onions, I pick them, twist down the top after cutting the grown onion off, this allows the onion bulb to continue to grow after. I slice the green onions and dry them for winter use in cooking!

Cabbage I’m hoping to get some they did really good however the bugs tend to get at it. You can peel the layers off, till you get to where they didn’t get. Beware they go to the base tho and tend to wreck the whole head of cabbage really fast!

Cucumbers did not do good this year, they just didn’t come up good, and with how the summer went, I did not try to replant them.

Broccoli and cauliflower did not survive the crazy weather.
Beets I am hoping are good, there are some thing that stay in the ground till the end, as the leaves can frost and they beet will be ok, so those stay for now, same with the carrots. I will let you know how they did when the time comes!

Brussels sprouts did ok, they stockes got bent, these can also stay, they say Brussels sprouts taste better after the first frost, so I always leave those till the end, but just as the cabbage the worms love it and can take a whole plant down really fast. I will have to see if they survived this year.

Peppers are doing good, they will be picked soon and placed in a box to ripen up, you can do the same with tomatoes. Pick them when the weather is getting cold and they will ripen inside!
Have you done this, to make sure they tomato makes it, and does not got hit by frost!

Then the melons, they are coming, this will just come down to is there enough growing time for them to make it worth it. They are blooming and growing, but with such a short growing year it gets hard, never mind almost freezing weather in August!

As for my potatoes for some reason I have issues with them! I actually assume I am not hilling the  enough, so next year I will try harder to get lots!
With how much room they take up, and I am lucky enough to have a farmer supply me with lots for the winter it’s ok that they are not always great. However I will figure out how to make them great, to get my own winter stash!

Now that is it September everything will be coming out and being prepped for the winter get months.
What do you do to safe your garden produce?
I will be sharing how I prep my vegetables on my Instagram under Kandis Blask and Facebook at classyclassicsbykandis!

Make sure to follow to see two it goes, what I do, and the different ways to do some!

I hope your garden and summer went amazing!

Tell me about it, on here or one of the social media pages!

I would love to hear and have a conversation with everyone one summer and garden fun!
Till next week have an awesome weekend and a week!
Have a topic you want to hear about, just let me know!
I would love the input and ideas!
Till next time happy harvesting!

Uncategorized

Road Food!

Mom I’m hungry! Mom I’m thirsty! Mom they won’t share! Mom they drank it all! Mom Mom Mom!

It doesn’t seem to matter where you are or what they are doing the name mom gets thrown around like a frisbee at a dog park always going in circles!

Then to make everyone happy, but keep everything even and fair is almost as easy as trying to go to the bathroom by your self! Hahaha.

Kids are always needing something, and trying to get fast food when your out and about gets pricey! We can drop $60.00 no problem to feed everyone doing fast food!

That is crazy, you know what I could purchase and make from a grocery store more than a burger and fries that’s for sure!

Hi I’m  Kandis I am a stay at home mom for the last 10 years, with 4 children now and I am no stranger in snack attacks!

With summer break here and we are on the road oh so much I thought I would share some tips and tricks I have picked up along the way to pack some food for in the car to save time and money!

Where to start, this year I have a couple things up my sleeve to make things even easier on me.

I have some paper clip together bowls that I got from a dollar store, and I have some baseball hotdog holders also from the dollar store.
These allow it to be easier to hand out food, vs throwing it to them.

There is also their goody bags that each child gets and is located in their drive time bag!
These are snacks that are prepped and divided the night before.
Depending on how long we are done for depends on what is in the bag.
Usually there will always be friut, veggies, sandwich, treat and a drink. They also of coarse have a water bottle they take.

Then I keep the bought goodies or more favored goodes closer to me that would get handed out in the containers.
This will save so much in money, fighting and continued mom I’m hungry  mom I’m thirsty, mom, mom, mom!

How do you handle food on long car rides?
Do you pack stuff, or use it as a special lunch time?
Let me know!

With having a packed lunch located in their drive time bag the kids know that they can eat it as fast or slow as they wish, however when the food is gone in the drive time bag, that’s it for on your own food.

Hope you enjoyed this blog let me know if you liked ito, as I have more on the road tips and tricks!
Go a head and hit that follow button for all the upcoming blogs here on Classy Classic’s By Kandis.

More daily posts for summer fun coming follow me on Instagram under Kandis Blask or over on Facebook at Classy Classic’s By Kandis.

Sandwiches and a lunchable 

Have some fruit added along with one cookie

Looks better the  a fast food burger haha

Packed away in my snack bag 
Uncategorized

Snack Attack!


Have you ever wondered where all the food goes! How do the kids eat so much?

Why do prices go up in the summer for snacks and drinks?
Do they really need to eat every 10 minutes, and how did $100 of snacks disappear?

 Hi there and welcome to Classy Classic’s By Kandis, we are going to talk about feeding those kids through the summer break!
As a mom of 4 kids we go through a lot of food here, like a lot of food. I have a couple tricks up my sleeve to make those snacks and back yard picnics go smooth as you juggle everyday life along with summer fun.

I have make a schedule at my house to make sure the kids are fed and watered but, still eat healthy and not just eats the expensive snacks that don’t fill them up for more then 5 minutes.

I have a rule that if its in a wrapper say gold fish packs, fruit by the foot, granola bars etc.. they are car treats and not to be eaten at home!
Summer is so fast paste the last thing you want to worry about is cooking 3 meals a day, plus snacks and treats.

The first thing I will say is freezer meals are a life saver in the summer. With so many options you can go to any back yard bbq and already be prepared for it.

Some of my meals I am hoping to prep as I should of stated already but havnt lol is…. egg wraps, waffles, pizza bites, burgers, twice baked potatoes, taco meat, spaghetti bake, perogies, chilli, muffins, cookie dough logs, rice crispy and brownies.
Look g
These are some ideas that I’m hoping to get into my freezer, to have on hand for any thing that summer may throw my way!

The schedule that I have is made out so the kids are still eating every couple hours, however I can know that it is not out of boardness, and they are eating healthy.

I have times so that the kids won’t be eating right before a meal, they are not gone all day, and they have that little sit and rest periods, even just 5 minutes.😂 Let’s start shall we?

As everyday breakfast this is harder to time but usually between 7:00 and 8:30 would be a safe bet! Yes?
The first snack is set for 10-10:30, lunch around noon.
Afternoon snack is set around 3 to 4 they get an hour to be flexible for play time and naps for the little one.
Then supper between 6:00 and 7:00 pm, snack or treat at 8:00 pm with the last bedtime snack not past 10 pm for movie time.

I aim to have the big kids in bed around 10:00pm. Now let’s look at what they get?

Their morning snack is fruit, veggies and or dairy.
Afternoon snack is fruit, veggies and a pantry snack.
The8 pm snack is fruit with a treat of the day this is where the freezer treats come in handy so they are not going to the store.
Then the late movie bedtime snack for the big kids could be say popcorn or something light.

This way I can prep a big thing of fruit and veggies for them to tackle over the day, sweets are limited and my rule also is if it’s in a wrapper it’s not for at home.

The wrapper goods that tend to run more money… for some reason or another are for on the road or away fun, make day, hiking, park fun etc!
So there you have it!

This is how I tackle summer eating, and ensure they are eating more healthy and less sugar on those hot days.

Let me know if you liked this blog.
I have fun posts coming this summer that I hope we can share our ways to beat summer boredom eating.
What do you do for food in the summer?
Do you have certain snacks?
Do you do a daily snack bucket for the kid’s?
This is where each kid gets a basket and gets filled each morning, it’s for the day and is up to them how fast they eat it all!
I would love to hear how you roll with snacks!

Till next blog when we tackle more summer fun, have a fun, healthy eating day!
Don’t forget to hit that follow button for all the upcoming blogs and follow me on Instagram under Kandis Blask and Facebook at classyclassicsbykandis for more day to day fun!

Please note the pictures were snack prep for only my toddler!